Creating a DHTML Interaction with Fireworks and Dreamweaver
In this tutorial, you will create a simple quiz interaction using Fireworks’ export to CSS option and the Dreamweaver Show-Hide Layers behavior. Few software programs enable you to create interactivity without having to do any scripting, but Dreamweaver is one of them. When you add the Fireworks export to CSS layers feature to the workflow, you have an easy way to add graphics into the interaction.
In this particular quiz, you will ask the user to specify the author of a book by clicking the author’s name from a list. A green check or red X graphic will appear, depending on the answer.
Before jumping into the steps of the tutorial, you should have a sense of the overall process. To create a DHTML interaction with graphics, first build all of the graphic elements in Fireworks. Next, export them as CSS layers. Then, moving to Dreamweaver, import the graphics in the CSS layers, and assemble the remaining static elements. The last step is to add the behaviors that create the interactivity.
Whenever working with multimedia, whether its DHTML, Flash, Authorware, or Director, you should try to assemble the static assets (text and images) before you start scripting.
Now that you have the big picture in mind, let’s get to work.
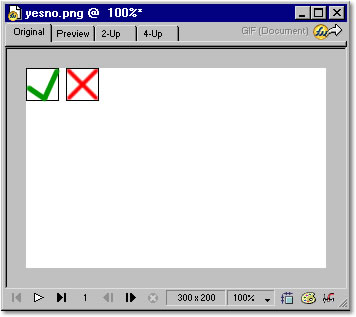
| 1. | Create a new Fireworks document. The size doesn’t matter too much for now, so give yourself enough room to work, say, 300 x 200 pixels. | |
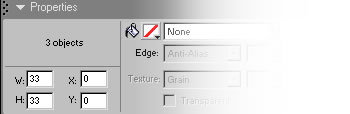
| 2. | check mark graphic. Enclose each in a square, as seen below. Both graphics should be exactly the same size—use the W and H settings of the Property inspector to make sure. Mine are 33 pixels in height and width. |
| 3. | In the Frames panel, insert a new frame. For this interaction, you will use frames as the objects Fireworks uses to create CSS layers. | |
| 4. | Select the objects that make up the red X, and choose Edit, Cut. Switch to frame 2 and paste the red X (Edit, Paste). | |
| 5. | With the objects that make up the red X still selected, enter 0 in both the X and Y fields of the Property inspector, to move the objects to the top-left corner of the canvas. Switch to frame 1, select the objects that make up the green check mark, and move them to the 0,0 position as well. |
If you think about it, though, the first two segments occur before the Attach Text to Path step. If you already have a text block and a path on stage then the command could simply attach the text to the path and change its orientation.
While you’re at it, you can also make sure that the text is center aligned. It already is for this text block, because you set that back at the beginning. Unfortunately, that part was before a separator line. So, you can apply center alignment again, which makes no difference to the current text, since it is already center aligned; however, it will add that step to the History panel, which in turn enables you to add it to your final command.
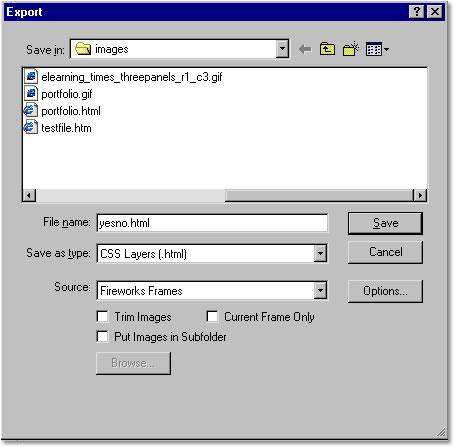
When exporting frames to CSS layers, make sure that Current Frame Only is unchecked, so that Fireworks exports all frames.
| 6. | Choose Modify, Canvas, Trim Canvas. The canvas should now be the exact same size as each object. This step is important, because the CSS layer that Fireworks generates when using Fireworks Frames as the Source is the same size as the canvas. | |
| 7. | Choose File, Export to open the Export dialog. Select CSS Layers (.html) in the Save As Type drop-down menu. Select Fireworks Frames as the source. Be sure that Current Frame Only is unchecked, as seen in below. | |
 |
||
| 8. | In Dreamweaver, open the file you just exported. When it opens, you will only see the red X; that is because both layers have the same position, and they are stacked above each other. | |
| 9. | Starting with the red X, drag each layer off to the right somewhere; you’ll position them more precisely later. For now, you just need some room to add some regular HTML text. | |
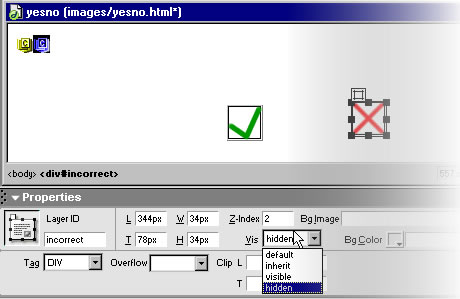
| 10. | One at a time, select each layer, and in the Property inspector, give it a Layer ID of “correct” (the green checkmark layer) or “incorrect” (the red X layer). Then change its visibility attribute to Hidden, so that they are both invisible when the page loads. Once you set the visibility to Hidden, the layers also disappear from Dreamweaver. You can select them, though, by clicking the appropriate layer icon in the top-left corner of the document window. |
You can set layer attributes, such as name and visibility, in the Property inspector.
| 11. | Enter any multiple choice question in plain HTML in the document, and format as desired. | |
| 12.. | Using the layer icons at the top of the page to select the now hidden layers, position them in a desirable place off to the right. Use the Property inspector L,T settings (equivalent of Fireworks X,Y settings) to ensure that they are both exactly in the same place. | |
| 13. | One at a time, select each multiple choice answer, and enter # as the link (shown below). The # converts each option to a hyperlink, which is necessary to trigger the behavior. But obviously you don’t want the hyperlink to take the reader away from the page. The # character basically creates a dummy URL to enable the behavior. |
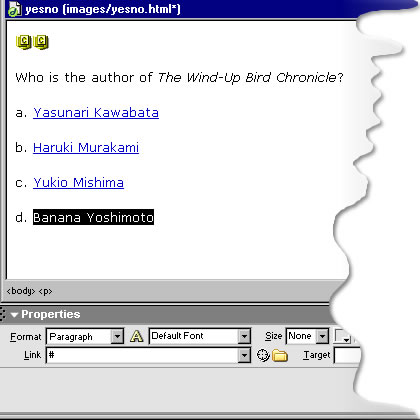
Adding the # character as the link creates a dummy URL that you can use to trigger the behavior.
| 14. | Click once anywhere in the first link, so that the cursor is blinking between any two of its letters. In the Behaviors panel (Window, Behaviors), click the Add Behaviors (+) button, and choose Show-Hide Layers from the list. | |
| 15. | In the Show-Hide Layers dialog, select each layer in turn and click the Show or Hide button (shown below). For incorrect answers, the correct layer should be set to Hide, while the incorrect layer should be set to Show. |
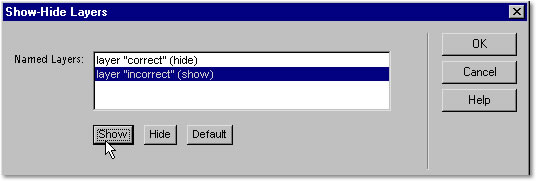
Use the Show-Hide Layers dialog to specify which layer(s) are visible or hidden when the link is clicked.
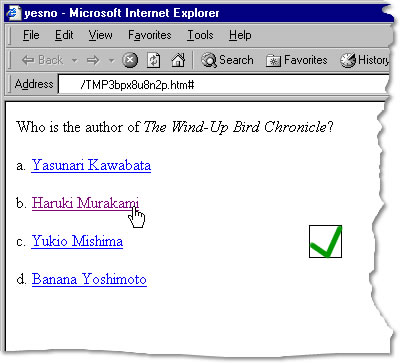
| 16. | Repeat steps 14 and 15 for the remaining three links. Don’t forget to invert the settings for the correct answer. In my quiz, option b. Haruki Murakami is the correct answer. | |
| 17. | Press F12 to test the file and take the quiz (shown below). |
Conclusion
I’ve kept this tutorial to the minimum, so you could see how easy it is to create DHTML interactivity with Fireworks graphics. Imagine what you could do with some of the more complex DHTML behaviors, such as the Drag Layer behavior, with a series of photos or hand drawn diagrams. In spite of DHTML’s limitations, you can still create some cool interactions, adding richness to your HTML pages, without any programming.